Saturday, January 17, 2015

Project Life-Figuring out my way

Wow! It's been a whole year since I blogged! I can't say that it's surprising though. Blogging, I've found is something you really have to be serious about to get it done. Last year it was one of my "resolutions" and I think we all see how those usually turn out...as in, they don't. So this year, instead of making resolutions I am making intentions. And one of my intentions is just to blog more often. Not once a week, or once a month. Just more often than I have in the past. If I exceed that I will be doing better than I was. 2014 wasn't a kind year for me, but despite that I am keeping my heart and mind in a good space as much as I can, planning for the future and trying not to worry about the past.

Today I want to talk about something I have wanted to do for about three years. Project Life! Most of us know what it is. Some don't. If you are in the minority and don't go Here to find out about this awesome and easy memory keeping plan created by the amazing Becky Higgins.

I've had the supplies to do Project Life for about 3 years, sitting in my art room mocking me for not picking them up and starting some sort of memory keeping. It's ironic in a way, because I got my start  doing mixed media art by discovering traditional scrapbooking and paper crafting. When I find something that really interests me I usually jump in with both feet, so I began to scrapbook, bought many supplies that I never used, and quickly became bored doing 12x12 layouts and mini albums. However, finding scrapbooking guided me towards discovering how much I really love mixed media art. So despite all the paper hoarding, embellishments sitting around doing nothing and me feeling frustrated for awhile, everything worked out for the best. I now use those 12x12 papers, embellishments, etc in a variety of mixed media art and art journals. But then along came Project Life. A whole new use for those supplies was born.

2015 Title Page
I was very intrigued by this new system that the amazing Becky Higgins introduced to the memory keeping world. I thought to myself, now that should be doable. So I started ordering core kits, albums, grid cards, even digital kits. And the core kits were a little hard to come by in those first couple of years and the variety was limited. But mine just sat there, the same as my traditional scrapbooking supplies. And they sat there unorganized to boot.

Towards the end of December of last year I started thinking about Project Life again (among many other things) and why I hadn't made it a priority in the last three years, lamenting at the albums of memories I could have completed in that time. Then, the thought that I could make these albums for my grandsons came to mind. I had been wanting to start writing in a book for Tucker, the oldest, for a long time but just writing isn't really what I wanted to do for him. I did start a journal just for the boys this year, but I wanted something that could hold tangible pieces of my life and my written words. It dawned on me that PL would give me the freedom to be creative and also allow me to tell the stories that I want them to know about me, about how I lived my daily life, and what was important to me. It will tell them who their Grannye Kellye is, what she did, what she stood for,  and what she  dreamed about. I really wish I knew all of those things and more about my grandmothers but I really know very little about their daily lives. That gave me all of the motivation I needed to make doing Project Life a priority this year and in the years to come.


I started doing research on other people's approach to their Project Life process. I wanted to see what was working for other people and what wasn't working. I looked on Pinterest, did lots of web searches and reading websites, watched YouTube videos, and I followed conversations in some of the Facebook groups I am in. There is a ton of information out there! I noticed a lot of people were converting from doing 12x12 albums to smaller sizes, like 6x8. Others were switching from doing weekly spreads to monthly spreads. Others were switching to doing only digital using the Project Life App that was introduced recently. I took all of this info into account when deciding how I would approach my Project Life for the first year and my takeaway from it was that I'm not really going to have a lot of rules.

The upper right 4x6 will be filled in with "one little thing" for each day of January
  • Above all, I want to feel free to use whatever page protector design that my photos, mood, or theme, etc. calls for. I don't want to be tied down to using only Design A all year. To me, that would just be extremely boring. I need some variety. 
  • My plan is to make one weekly spread this year of at least 2 pages, but if I want to add more I will.
  •  I will also be including one of the 6x12 envelopes and keeping all of my receipts for the month in it. This serves two purposes. I have my receipts and my ancestors can see what I spent my money on!
  • If possible I will be using rounded corners on my cards and pictures. In some instances I have found that I could not round them. For example, the calendar cards I chose to use have type that is so close to the edges of the corners I would chomp it off if I rounded them.
  • I will use my own handwriting as much as I can tolerate. I know I will be typing on journaling cards too but I want to practice my handwriting more so that it will get better, which will then make me happier to look at it and want to use it even more


I'm using a lot of tools to help me construct my pages such as apps, my printer, an HP Envy 7640 (I am printing at home; to me it's just more convenient-more on my ink strategy in another post), my planner for PL, corner rounder, lots of different pens, stamps, ink pads, spray ink, cards organized by color in plastic containers, page protectors stored in an album, my Smash labeler, Tim Holtz Tiny Attacher, and also some tools that some wouldn't call "traditional" PL supplies such as white sage and a conch shell and my feather fan. I usually smudge myself just to help clear my energy and put myself in the right frame of mind. I also diffuse essential oils into the air. Which oil(s) I use depend on my mood. I like to feel at peace while creating but it can't always be that way so the times that I can't feel peaceful are usually the times that I just paint or do something in my art journal, not Project Life.


I'm looking forward at the end of 2015, to look at my album(s) and reflect on a year full of many good things that will make my heart swell with bliss and also the not so great things, so that I will remember what I have been through and how strong I am and so that my grandson will know that too. Project Life is really for them, Tucker and Gavin. I love those boys and I hope they love my albums. When we make these albums for other people, as well as ourselves, they become that much more special.

Here's a few photos of some of the details of my first pages. I hope all of you are having an amazing weekend! xoxo


January 6x12 Envelope for Receipts

Signing Off!
xoxo
Kellye


Saturday, January 4, 2014

My Path

Along this path my soul expands
and
the knowledge that I crave has room
to
enter into my being.

Along this path there is no room for fear
and
my warrior goddess stands tall
with
her sacred tools by her side.


Along this path I seek heart-connected relationships
with
other wild women, artists, healers and seekers
so
I can have connection with others who love the journey.


Along this path my heart swells with eternal love
that
makes me want to skip, dance and sing
because
I know that I have finally found my-self again.


Along this path I see the hearts and souls of others
who
have been through many things, good and bad
but
still persevere and celebrate the lessons they learn.

Along this path, my path, I can see my big life and it's the best one ever,
for me.

Saturday, December 7, 2013

Finding my Vision.

I've been vision-booking.

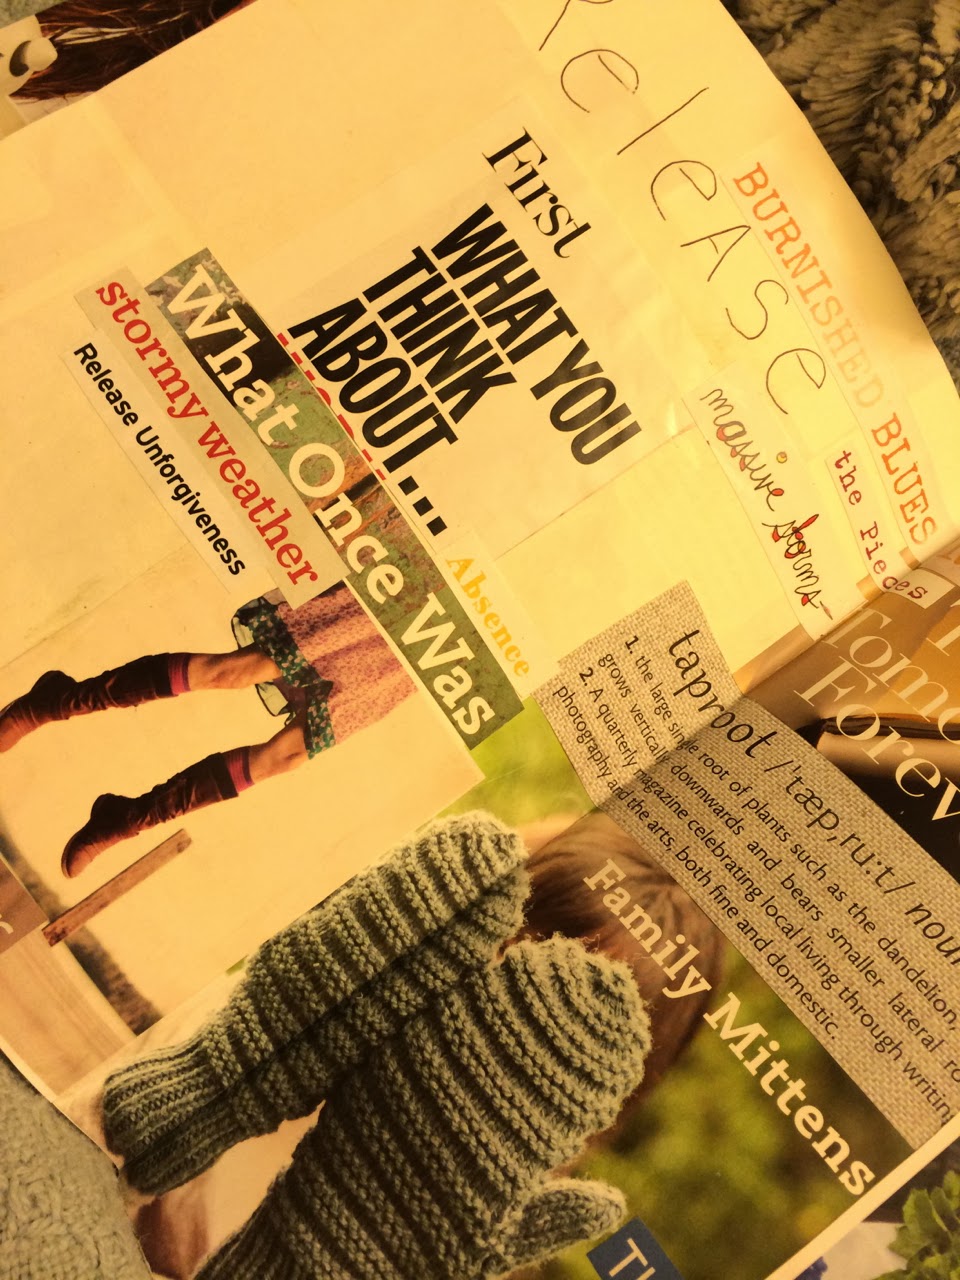
Ever since I took Hannah Marcotti's class, Hello Awakening Woman, at Serendipity last September, in the Outer Banks of North Carolina, (which is the *perfect* location for this retreat), I have been addicted to the technique of vision-booking. With Hannah's buttery, yummy voice, she soothes you as she teaches you how to take magazines and cut out images and text that speak to you and then you just start gluing things down without much thought really. With a glue stick.  And a composition book. That's it. Sounds sounds so very simple. And it is really. But it goes so much deeper than that when you go back and look at what you have glued down.


Hannah talked of things that she glued down actually manifesting in her life and I absolutely believe that it can happen if you "vision it." I've already been surprised by some of the things that have happened to be placed next to each other and it has kind of made me addicted to vision-booking. I have started to hoard my magazine so I can cut them up instead of just recycling them outright. Only the waste of the magazine goes now. The forgettable parts. For me anyway. For someone else, what I cut up may be their precious thing that they paste into their book. That is one of the beautiful parts of this technique. As the saying goes…"One man's trash is another man's treasure.


One of the biggest things that surprised me about Hannah's class was that it reminded me of a time when I was a young girl where I did similar things with magazines, cutting out the things that called to me, pasting them down in composition books. The kinds with the black covers, lined, that we had to buy for school. I'm not really sure why I quit doing it. I didn't just quit one day and that was it. It went away gradually. Stopping for awhile, then picking it up momentarily, then coming back, and away, until finally one day there was just no time for it. Life became too-filled. I had no room for visioning. I had no room for me. Then I lost me.


Years later, while finding me again, Hannah teaches me of vision-booking and I don't think it was by mistake. I believe it's a great enhancement to journaling, and a great thing to incorporate into your life to "envision"one's life, basically. Try it yourself with just a few prompts such as "I am" and "I deserve" which come straight from Hannah. Cut out things in some magazines that inspire you and then start pasting them down. You will probably be surprised and amazed at what you begin to see. I was.


Hannah gave us temporary tattoos that say the word "yes" on them. All we need to do is say yes. I still have that little tattoo and something is telling me that it's time for me to use it. It's time for me to say yes. Things that seemed so insurmountable just a year ago seem so, not easy, but so much smoother now. I don't feel like I need to fight it so much. I can manage things. So if I can do those things, why not do even bigger things? Why not? A girl's gotta dream doesn't she?


Thank you Hannah, for being you with your voice of butter and heart of gold, and for your wisdom and your spirit. You are one amazing awakening woman. You can check out Hannah's offerings at http://www.hannahmarcotti.com
xoxo
Kellye

Thursday, November 21, 2013

One long year...

it's been a long year
full of change and healing.


i drove and flew to places as close as 2-3 hours
and
as far as across the country,

from the sandy deserts of arizona
to
beautiful beaches of the obx,
to
warm, sulpher hot spring at esalen
to
beautiful mountains near petaluma.


my heart feels grateful and full,
and my throat feels more open and
i feel able to speak my truth.

my authentic-self has returned to the surface
and i no longer feel the need to
suppress my emotions  or
feel like i am not enough.

i am enough. we are all enough.


i have the biggest dreams for
my-self.
i no longer see only darkness,
but
see light streaming into the tunnel
i have been living inside of
and have been digging my way
out of
for so many years


i am right at the entrance
to the beginning of
the rest of my life.


Wednesday, October 2, 2013

Things Are A'Changin

I've tried many times to write this blog post. I've fretted, worried and wondered..."Should I really share this much of my life with people?" Then I'd think to myself, "no one will read it anyway" as I sometimes do in a self deprecating way. I've been mildly challenged to write more by a few friends, one I've met in real life and have come to respect ginormously, and others that I've only met online but have come to know as much as I could possibly know, without having met them in real life, yet. So I've decided to accept their challenge and go with what I know, which is my thirst for infinite knowledge, my long and tedious quest for personal growth and healing, my desire to have more meaningful, heart-connected relationships with other women, my ferocious urge and longing to give back to others what I am learning about myself, the creative initiate inside of me that is emerging, changing and leading me into a new way of life, my own reawakening of the spirit and soul, and the beauty of love that I am learning how to give without expecting anything in return, and the power I am taking back from places it did not belong to begin with. I could go on with those things, those truths. The things I am learning from the extraordinarily authentic and "truth"-filled human beings who's soul's I am in love with and I honor them with the commitment I make, to heal my own self, my own soul and to transform into knowing who I have always been from the beginning and fulfilling my path on this earth. Most of all I give thanks to my Creator, because without Him, I could never create my own beautiful life.


So where to begin? Some of my friends out there may think that I'm certifiably insane after reading the next few blog posts that I will write, including this one. My hope is that if I am to suffer any judgement over my beliefs, which have always lived inside of me and have been waiting patiently for me to catch up to them, dance with them like a Hafiz poem that can make you laugh and cry at the same instant, that the judgement will be more towards the positive side than the negative. I know how people can be with their judgements, so I'm prepared to lose a few people from my circle of friends. And that's ok. In fact, it's already happened. It happens in the circle of life. (Notice the circles so far, and the circles to come) I'm very sensitive and tender-hearted so it can sometimes be very hurtful, but I'm learning that I don't have to let it affect me to the extent I have in the past. I'm becoming whole again, little by little. One tiny baby step taken every single day, knowing that I will stumble now and again, just as little babes do.


The solidification of my "wholeness" has been a very complex, beautiful, symphony of people, places, and sometimes, things, that have brought me to where I am now and where I am going. Without all of the people, places and things, I would still be stuck in a black hole of unrelenting torment, mental disarray and chaos. For so many years, very few people even knew that I carried so much "weight" around all of the time, that I was in pain and anguish. I smiled, said everything was fine, never wanted anyone to feel my anguish. But I felt diminished and worthless. I was worthless, in my own opinion because I had been taught that I was worthless. I was taught that I should never cry, have no opinion, keep my mouth shut and never cross the tyrant. What is worse is that I was given mixed signals about it because I was always treated differently around certain people than I was with others. I was treated better around certain people. For years afterwards, when I realized how I had become what I was, I started to show how I felt in a very strong manner. I was crushed from my inner being and finally I let it out. Unfortunately, I think that in releasing all of that built up anguish and sorrow I actually caused people to run from me. I was that "too much" woman that Pixie Campbell and Athena Perakis speak of on Sacred Grit to the nth degree. I was beginning, in my own "there is no wrong way" way of dealing with all of my heartache and pain. It wasn't the best way but it was my way.


Now I have to take responsibility, because it's my beautiful life and I don't have to let that ruin my entire spirit and soul.  I was a child when my torment started and it really never ended as far as the trauma it instilled into my body. However,  I have managed to learn, with the help of a few tremendously wise mentors, that I can put a stop to the torment and pain. I can learn to manage it.  I am able to learn that I am worth something and I do belong. My feelings do matter. Your feelings matter. You matter. We all matter. If only we could all realize this and treat each other like we all matter. But not everyone will think this way,  at any time in their life. I cannot be responsible for the fact that they do not. I can only be responsible for the way I treat other beings and for the way I treat myself.


If you look at the world you can see that it is a beautiful symphony of things that work together. We as women need to look at this and employ mother nature's ways back into our lives again. We need to care about each other and ourselves. Circling women feed each other's soul and give each woman in that circle a place to feel safe, even for a few hours, and it encourages them to be better women, who can then go out and help our men and children be better souls. I want that world. I want to live in that world. Let's make it bigger.
Come with me to find the magic in our own healing in the circles that we will create. I'm just getting started. I hope you will join me.
xoxox
Kellye Kimmel

Sunday, September 22, 2013

My blog really needs some loving care....

I know that my blog really needs some loving care and attention right now. I'm trying things out and changing things up but not really liking what is going on with it now, so bear with me on that one.

I just wanted to share my latest project for Anna's Beachside Scrapbooking. This is a mixed media album by Prima that I am putting a lot of different "My Favorite Things" inside. The cover was created with washi tape and decorated with a Julie Nutting Doll.


Thank you Anna for providing me with such great tools to make these projects! I hope your customers enjoy and find some inspiration within them.
xoxo
Kellye

Monday, May 6, 2013

Happy Mother's Day!!


Mother's Day Cards with Pink Paislee Cottage Farms Line

Hello and Happy Mother's Day to all of the Mother's out there!

In this 2nd installment for the month I've made some Mother's Day Cards with the Pink Paislee Cottage Farms Line. I really love this line because it has so many of my favorite things in it like butterflies, vintagy, retro looking papers, arrows, flowers and much more. I made a total of 4 cards. I used my Silhouette Cameo to cut the bases all four of the cards.

In the picture below, you can see all of the products that Anna sent me for use with this project.


The first card I made, seen in the photo below, uses paper from the Cottage Farms line, one of the die cuts from the ephemera pack and one of the Burlap Flowers. I cut the card parts out of the paper using my silhouette Cameo. The base was cut from the Bushel paper, and the paper accents were cut from Bushel, Crate and Wheelbarrow. The small pieces were adhered to the card with Aleene's Clear Gel Tacky Glue.


In the photo below I made another card using the Cottage Farms Line. The card parts were cut using my Silhouette Cameo. The parts were cut from Wheelbarrow, Bushel, Barrel, and Market. I used a die cut piece from the Cottage Farms line. The flower brad is from My Mind's Eye Market Street "Love" Brads, and the heart stamp is from my stash using Ranger Archival Ink in Black.


In the next photo is another card made using the Cottage Farms Line. I cut it using my Silhouette Cameo, using papers called Crate and Barrel. I cut the Mother's Day sentiment out of the card from the CF Line and adhered it to the front of the card, embellishing it with 2 of the die cuts from the ephemera pack. I also used an iRock to put rhinestones on the tip of the crown and on the Mother's Day sentiment.


The next photo shows the above photo opened up to show the inside of the card.
It says "Queen for the Day."


The next photo shows the last card that I made using the Cottage Farms Line. This card is the "belly band" type of card that has a string wrap to hold it closed. I used a die cut from the Cottage Farms line at the top, layering a "Mother" banner cut with my Cameo. Another die cut from the CF line was adhered at the bottom right of the card using dimensional foam. A tiny heart was stamped on both sides of the card using a heart stamp from my stash and Ranger Archival Ink in Black.


In the photo below, it shows the card in the photo above opened up so that the inside can be seen. 


I hope you have enjoyed the cards I made this month with the Pink Paislee Cottage Farms line of products. I love this line and think it was a really great line to turn into Mother's Day cards with. Everything coordinates and it was so easy and fast to make these cards. Have a great Mother's Day everyone!!!!

xoxoxo
Kellye

Monday, April 22, 2013

Spring Garden Memory File Featuring Color Pop!


Happy Spring!!

Anna sent me a package of Heidi Swapp Color Pop Products and told me to do with it what I wished. Spring is in the air so I thought a memory file that I could put pictures and notes about my garden would be a great project for these products. Here is what Anna sent me...


The below pic shows what the front cover of the memory file looks like.


I used one of the color pop folders and misted it with Tropical Teal  Colorshine. I also layered color pop banners at the top along with some Teresa Collins banner strips and added the Scrabble Tiles from the Basic Grey "Fact & Fiction" line to spell out the word "SPRING." The black butterfly on the upper left was sprayed with Black Velvet Colorshine then wiped back to reveal the resist pattern. The two birds at the very top are from Recollections and were sprayed with Sweet Cherry Colorshine and I added iRock rhinestones for their eyes. There is another bird from the same line on the left side of the tag that I sprayed with Bronzer Colorshine. The rosy pink flower in the upper left corner is from Prima "Hello Pastel" and the leaves are from Iamroses.com. The blue, pink and black butterflies are also from the Prima "lifetime" Collection. The red bird on the far right is from Melody Ross. I used a color pop tag that says "beautiful" and attached it to one of the black and white color pop frames to make the center piece where a photo can be slipped in. I layered parts of color pop banners and HS trimmings on the far right side of the frame and also layered color pop banners on the left side of the tag. On the right side of the tag I used a Teresa Collins border piece. I spelled out "Garden" with chipboard pieces from the Basic Grey "Fact & Fiction" line. On the bottom of the frame/tag piece I layered a trimming from Pink Paislee that I sprayed with Dylusions Spray in London Blue, and another border piece from Teresa Collins. The two hearts at the bottom are from Pink Paislee and I sprayed one of them with Gold Lame Colorshine and the other with Sweet Cherry Colorshine. The buttons on top of them are from My Mind's Eye and I tied bakers twine into each of them. The brads that are on the tag are from the Teresa Collins "Memories" line. At the very top above the word "SPRING" I placed labels from Tim Holtz that say "Cherish The Memories of A Photograph." Inside the tag that says "beautiful" I tucked a bouquet of tiny roses that I sprayed with Sweet Cherry Colorshine. Closeup shots are below...


 The sticker that say "love and the sticker with the little flower on it to the right of the word "Garden" are from Teresa Collins.

The pink seam binding was sprayed with Primrose Colorshnie and was used to hold another memory folder on the inside.


When the folder is opened the next page is pictured below.

The inside of the folder was also sprayed with Tropical Teal Colorshine. I adhered a small memory file from the Serendipity line. On top of this I layered one of the HS tags that I colored with Tim Holtz Distress Stain in Squeezed Lemonade. Then I placed two of the mini instaframes that I placed washi tape from my stash along the bottoms. Along the top of the mini folder I layered a color pop banner with some yellow HS trimmings that I fluffed with my heat gun. On top of that on the far left I layered some of the Teresa Collins die-cut flowers from the "Memories" line and put a brad from the same line through them. The bird is from Recollections and I sprayed it with Mint Green Colorshine and placed an iRock rhinestone for it's eye. To the right of the mini instaframes I put a banner from Fancy Pants (yellow patterned) and on top of that, some small banners from My Mind's Eye. Above the tiny banners  I placed a sticker from HS that says "scatter sunshine." The banner running along the top of the teal part of the larger memory file is from Teresa Collins. The pink bird below that is from Prima Resist Canvas and I colored it with Tim Holtz Distress Stain in Picked Raspberry then wiped it back to show the resist pattern and added an iRock rhinestone eye. The flowers to the right and below the bird are from the same line as the bird and were sprayed with a combination of Sweet Cherry Colorshine, Mustard Colorshine, Spiced Marmalade Distress Stain and Squeezed Lemonade Distress Stain, then wiped back to reveal the patterns. On the top of the bird is another of the butterflies from Prima. The stem and leaves of the flower are from the same Prima line and were colored with Dylusions Spray in Cut Grass.  The butterfly on the flower is from Prima.  A color pop banner was sprayed with the Dylusions Cut Grass Spray and placed below the Prima flowers. On the right side of the small memory file, a tag from the HS was adhered where it hangs off of the folder. I pulled the wings of the butterflies up and colored them with Chromatix markers from American Crafts.


Close up shots are shown below...


The next photo below shows the smaller memory file opened.


On this page I again layered color pop banners on the top and used a small portion of a clear pop banner. Underneath the clear pop banner I place another banner from Fancy Pants "Park Bench" line. To the left of that I placed another mini instaframe, which I also layered with banner pieces from Teresa Collins at the bottom and at the top another piece from TC and a piece of Pink Paislee trimmings colored with Picked Raspberry Distress Stain. On the bottom I used another banner from the Fancy Pants line, adhering it with my Tim Holtz mini stapler.

The picture below shows the upper part of where the smaller memory file is opened inside the larger memory file. This picture shows the bird and flower already described above, and also shows where a HS fotostack was placed. I again layered banners from the color pop line and from Teresa Collins and another bird from Prima colored with Sweet Cherry Colorshine. I tied two parts of it shut with seam binding colored with Tropical Teal Colorshine and Squeezed Lemonade Distress Stain. Prima butterflies were also used on the fotostack. 


Close up shots below...


In the photo below,  the next memory file that I attached with the pink seam binding that shows on the outside of the main memory file is shown. At the top, I lateryed clear pop banners and a Teresa Collins blue border strip, and some HS trimmings fluffed with my heat gun and another color pop banner, sprayed with Black Velvet Colorshine. Two instaframes from the Serendipity line were adhered to the front of this folder, which was sprayed with Sweet Cherry Colorshine. On the left instaframe, I layered clear pop and color pop banners on the top, and on the bottom I used HS trimmings and a Teresa Collins border strip. A sticker from HS that says "Celebrate the Little Things" was put above the border strip. Another Prima Canvas bird was attached with dimensional foam and it was colored with Spiced Marmalade Distress Stain. On the right instaframe another Prima butterfly was adhered on the right top corner. 


Close up shots below...


The photo below shows the above memory file opened and shows where the seam binding was put through it so that it could be attached to the main larger file. I put washi tape from my stash below the seam binding to keep the folds sturdy so it would not tear. An instaframe was place on the left and a layered banner piece from HS was cut in half and part was used on the top of the instaframe. On the bottom I place a small piece of a color pop banner on top of the instaframe and underneath it another HS banner piece with a piece of HS trimming painted in Broken China Distress Paint. On the right I adhered an accordion file with pockets inside from Teresa Collins so I could put pressed flowers and notes inside of it. At the very bottom of the folder I layered lots of color pop banners, a small piece of yellow trimmings and a piece of Artisan Ribbon from Pink Paislee that was colored with Mint Green Colorshine.


The next photo shows the top part of the memory file when opened. I used two banners from Fancy Pants and a Teresa Collins border strip cut in two pieces across the top and at the bottom a border piece from Fancy Pants.


The next photo shows the next small memory file from the color pop line which I sprayed with Mustard Colorshine. At the bottom, I used a piece of paper from HS and cut it into a fence with the Tim Holtz die "On The Fence." I painted some HS trimmings with Mowed Lawn Distress Paint and adhered it under the fence and fluffed it with my heat gun.  Die cut flowers from Teresa Collins were placed all in the fence for a big pop of color along with two more birds from Prima, one painted with Picked Raspberry Distress Stain and the other with Tropical Teal Colorshine.


The photo below shows the above memory file open. I adhered a mini fotosleeve book on the inside of this, placing an instaframe underneath it on the memory file which was sprayed with Mustard Colorshine on the inside. A Fancy Pants border and a Prima butterfly were placed on the bottom of the instaframe. Fancy Pants banners were placed on top of the fotobook and a Fancy Pants border strip in between them, with 2 pieces of color pop banners on each side of the FP border strip. On the top, above the fotobook I placed a Teresa Collins file folder. Behind the small Mustard colored file folder is half of one of the color pop Memory files that I sprayed with Tropical Teal Colorshine.


The photo below shows the other side of the Fancy Pants banner.


This photo shows the last page of this Memory File. I used a color pop Frame and layered some HS flower trimming on the left bottom corner with a Teresa Collins brad through the middle of them. At the top I placed a HS sticker with the definition of "Beautful" on it. Below the small yellow memory file is a piece of color pop paper that I traced to match the back of the half folder behind it, adhered the two together with a taper runner, and painted it with Golden Fluid Acrylics in Teal then wiped back the paint to reveal the resist. I normally use paper towels and windex on these types of paper because it tends to wipe the color on the resist part better than baby wipes and sometimes baby wipes can make the painted part peel up and expose the white underneath.


I am really looking forward to using this Memory File to place pictures and notes from my garden this year! I can also add the packets of seeds that I have planted in places in the file, such as the large area on the right side of the photo above.

I think this was a great way to use many of Heidi Swapp's memory file products. They are so flexible and easy to use almost anywhere, in almost in project, and you can integrate almost any other products you might have in your stash with them as well! THAT is one of the main reasons I love Heidi Swapp products.

Have a wonderful week!

xoxo
Kellye